Local Painting Contractors Las Vegas can add new life to your walls and rooms. Whether you need to hide blemishes or change the color, the job requires the right tools and preparation for long-lasting results.
Before you can paint drywall, it must be sanded and primed. It is also important to ensure the primer is completely dry before painting.
When painting drywall, a primer creates a smooth base coat that enhances paint color and provides long-lasting results. It also seals any nicks, chips, and imperfections on the surface to give your painted walls a professional look. A primer is a relatively inexpensive product but can save you time and money in the long run.
Unprimed drywall is very porous and absorbs paint quickly. This means that it takes many layers of paint to reach a fully pigmented, well-covered result. Priming drywall reduces the coats needed to achieve this, saving you money in both product and labor costs.
Whether you’re painting commercial or residential walls, a high-quality primer will help your finished product last longer. The key is to use a high-quality latex primer tinted to match your chosen wall hue. It’s best to avoid using a white primer, as it will show through your top coat and create an unsightly line of demarcation.
Most drywall primers are oil-based and are heavy on VOCs (Volatile Organic Compounds). Working with these products in small rooms without proper ventilation is dangerous. In these cases, opening the windows and using fans to circulate air is important. In addition, it’s a good idea to wear a respirator mask for safety and comfort.
Water-based drywall primers are safer and don’t emit as many VOCs as oil-based products. However, they may not offer as strong an adhesion as oil-based primers. When selecting a water-based primer, it’s important to read the label carefully to ensure it is suitable for your project.
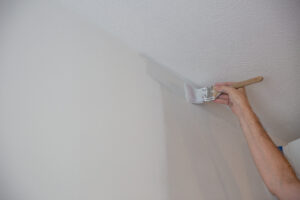
Before applying a drywall primer, it is important to sweep the wall and remove any dust or debris on the surface. It would be best to sand the area with a pole sander to remove flaking or chipping and prepare it for priming.
Once the drywall primer has dried, it’s a good idea to apply a second coat of primer for maximum adhesion. Once the second coat of drywall primer has dried, you can start painting!
The choice of the paintbrush and roller for a drywall painting project depends on the surface type, smooth or textured, and how many coats you want to apply. For a smooth surface, you’ll need a fine-tip brush. You’ll need a short or medium pile roller for a textured surface. If you plan to apply more than one coat of paint, investing in high-quality roller covers with a specialized nap length that helps the paint distribute evenly is a good idea.
A drywall primer is essential for this job because if you skip this step and paint directly onto the raw drywall, your finish will be blotchy and uneven. When choosing a primer, look for one designed for porous surfaces, as it will help the paint adhere to the drywall and create an impenetrable barrier against moisture.
Once the drywall is primed, it’s ready for your first coat of paint. Generally, applying two coats of paint to a drywall surface is best, giving each application plenty of time to dry in between. During the painting process, wear a face mask to protect your skin from the fumes of the solvent-based paint. A ladder or step stool is also required to reach high surfaces, and a drop cloth should be placed to protect the floor from splatters.
After a few minutes of drying:
- Check your work with a raking light to ensure the surfaces are flat and even.
- If you notice any humps or bumps, smooth them out with some drywall compound.
- Once you’ve sanded the surface with 120-grit sandpaper (handheld or pole sander), give it another 24 to 48 hours to dry before proceeding to the next step.
If you have a small area to paint, applying the drywall compound with your hand rather than using a power tool is best. This will give you more control, and you’ll be able to get into corners and crevices easily. However, if you’re doing an extensive project with several rooms or walls, using a power tool to save time may be more efficient.
Stencils are used in a wide range of visual arts. Fine artists and decorative painters have long embraced stenciling, but altered art, collage, and mixed media artists incorporate it into their work. Stencils come in all sizes and are made from various materials, such as paper, plastic, acetate sheets, or wood.
Stenciling is a time-consuming process and requires patience. A clean surface and a dry brush or roller are the keys to a good stencil. You must work slowly and precisely, especially when applying the paint over a stencil. A small errant stroke can cause the paint to run under the stencil, creating a blurred image on your wall. If you use a stencil with a lot of detail, you may need to apply several coats of paint and wait for the previous layer to dry completely before applying the next one.
A light spray of spray adhesive on the back of your stencil can help reduce bleed, but don’t overdo it, or you’ll risk ruining your stencil. Before you begin painting, mark the center of your stencil with a pencil dot (or use a clip-on stencil level). Most wall stencils have little notches in the corners that can be marked to help you line them up as you move them across your wall.
If you’re working with a large stencil, adding a piece of tape to the back is a good idea to hold it in place. This will prevent it from shifting and tearing when you’re trying to paint over it.
Start at the edges of your wall and work towards the middle with a light up-and-down motion (tap tap). Go slowly, or you’ll have to worry about bleeding under the stencil. Using a stipple brush, dabber, or sponge can help reduce bleed and make your project easier.
After finishing the stencil, let the paint dry for a few minutes before lifting it. If the paint is still wet, it can bleed or drip when you lift the stencil, making your entire project messy.
The ombre effect might look intimidating initially, but it’s pretty simple (and slightly imperfect blending looks more interesting anyway). This paint technique allows you to create gorgeous accent walls in any room with three graduated shades of the same color.
If you want to try this trend, here are a few tips for getting it right. First, use oil-based paint rather than latex because it dries slower and will be easier to blend. Also, ensure your wall is clean and free of dirt and dust before painting – any imperfections will appear more easily.
To start, divide the wall into uniform sections with a tape measure, yardstick, or straight edge. Lightly mark each section with a pencil to indicate where you want the paint colors to end and begin. For example, if you’re going to do a classic ombre with the darkest color at the bottom and the lightest shade on the top, draw lines from the ceiling to the floor, marking where the two ends of your sections should be.
Next, paint the middle section with your second-lightest shade, leaving 3″ to 6″ of space between it and the top section. When you’re done, apply the same paint to the bottom section of the wall, again leaving a few inches between it and the middle section above.
Then, in a separate paint tray, mix equal parts of your lightest and middle shade. Use this blended paint on the transition area between the middle and bottom sections of your ombre, applying it with a brush and blending the edges to get a smooth finish.
Once the paint dries, wipe away any remaining lines and touch up any spots where the different paints have overlapped. If satisfied with the result, remove your drop cloth and replace any outlet or light switch covers. Leave a window open to help the room air out and dissipate any lingering paint smell. Now you can enjoy your beautiful ombre feature wall!
